The Nureva® HDX series is coming soon.
Technical support articles are being prepared ahead of HDX availability and may be updated as features, functionality and guidance evolve.
Nureva HDX audio systems provide high-quality microphone pickup and speaker output in a variety of room types. Adding a subwoofer to your HDX system enhances low-frequency performance, delivering richer, more immersive sound — especially in larger rooms.
Subwoofer recommendations
For optimal low-frequency performance in rooms ranging from 30’ x 30’ to 40’ x 60’, active subwoofers with the following specifications are recommended:
Frequency Response: 25–45 Hz to 150 Hz
Maximum Output: ≥120 dB @ 1m
Inputs & Controls: Balanced analogue input, low-pass filter adjustment, and gain control.
Only active (powered) subwoofers are supported by the HDX system; passive subwoofers are not supported and will not function when connected. The subwoofer will only be active when the microphones are not in use and HDX system is in music mode.
Subwoofer placement
Subwoofer placement should be based on the size, shape, and acoustic characteristics of the room to maintain consistent low-frequency coverage and minimize uneven bass response. Follow the placement guidance provided in the subwoofer manufacturer’s documentation. Once the subwoofer is installed, verify performance using the steps below:
Set the subwoofer volume to approximately 50% and the cross over to 120 Hz, then play the HDX demo track.
Walk the room and evaluate low-frequency coverage across the listening area, paying particular attention to positions closest to the subwoofer.
Adjust the subwoofer level as needed to achieve balanced bass that is not disruptive to nearby users.
Use the subwoofers crossover adjustment and gain controls to fine tune system performance as required.
Subwoofer connection
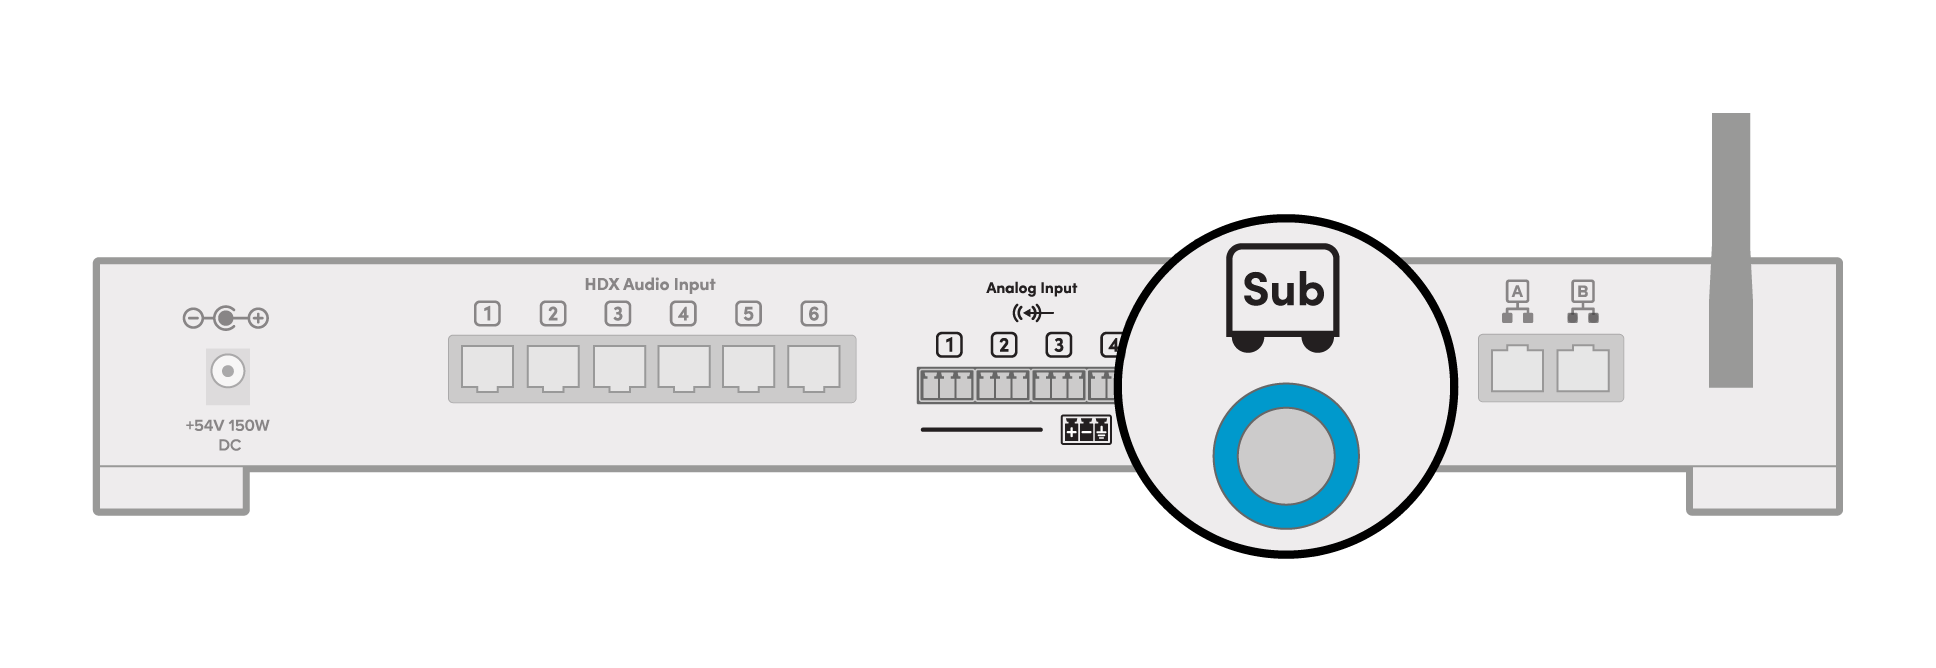
The HDX series devices feature a subwoofer port on the back of the system hub. The HDX subwoofer output provides a line-level signal (maximum 4 dBu / 1.23 Vrms).
Balanced connection
If your subwoofer uses a balanced input, you can connect it using a ¼" TRS (Tip-Ring-Sleeve) plug.
Tip = Hot (+)
Ring = Cold (–)
Sleeve = Ground/shield
Considerations
Use a subwoofer with a balanced analog input and built-in amplification (active subwoofer).
Passive subwoofers are not supported and cannot be driven directly.
Once connected, the subwoofer will be automatically detected and appear in the Nureva App device list.
Unbalanced connection
If your subwoofer uses an unbalanced input, you can connect it using a ¼" TS (Tip-Sleeve) plug.
Tip = Signal (+)
Sleeve = Ground/shield
Considerations
Use a subwoofer with an unbalanced analog input and built-in amplification (active subwoofer).
Passive subwoofers are not supported and cannot be driven directly.
Once connected, the subwoofer will be automatically detected and appear in the Nureva App device list.
Troubleshooting
No subwoofer output
If the subwoofer produces no audio when the HDX system is connected through a meeting room computer, first verify system state and settings before troubleshooting hardware.
Check the microphone state
Audio bar lights are blue, green or red
The microphones are active and subwoofer output is disabled by design.
Audio bar lights are white
Normal playback mode and the subwoofer should function as expected.
Important
Opening sound settings or certain apps on the computer can activate microphones — even outside of a conference — can change HDX system behavior.
How to Resolve
Ensure the system is not in an active microphone state.
Close sound settings or applications that may be accessing the microphone.
Confirm the HDX audio bar lights return to white.
Subwoofer troubleshooting
If the HDX system is in the correct state and there is still no output conduct further troubleshooting.
Power
Ensure the subwoofer is plugged in and turned on.
Check for power/indicator lights.
Connections
Verify the audio cable is securely connected.
Try a different cable if available.
Ensure that the correct input is used on the subwoofer.
Source settings
Confirm the subwoofer is enabled in HDX system settings.
Check volume levels and ensure nothing is muted.
Subwoofer Controls
Increase subwoofer volume (gain).
Set crossover to a typical range (~80–120 Hz).
Follow the troubleshooting tips in the subwoofer manual.
Test Signal
Play the HDX demo track.
Play content with clear bass.
Try a different audio source if possible.
Summary
Start by checking the HDX audio bar light color, as this determines system behavior: blue, green, or red indicates active microphones and disables subwoofer output, while white confirms normal playback. If needed, close any apps or settings that may be using the microphone to return the system to normal mode.
If the system state is correct and there is still no audio, perform basic subwoofer checks—verify power, connections, source settings, and subwoofer controls, then test with known bass content. If issues continue, follow additional troubleshooting steps in the subwoofer’s manual.