By connecting a USB cable from the HDL310 connect module to a computer, the HDL310 system can be locally managed through the Nureva® App. This USB connection is available as an alternative to a local area network connection or direct Ethernet connection.
HDL310 devices can only be managed through a USB connection to the meeting room computer if the connect module is not connected to a network.
Important
If an HDL310 that has been managed locally is switched to remote management over a network, the device settings will return to default settings and may need to be readjusted.
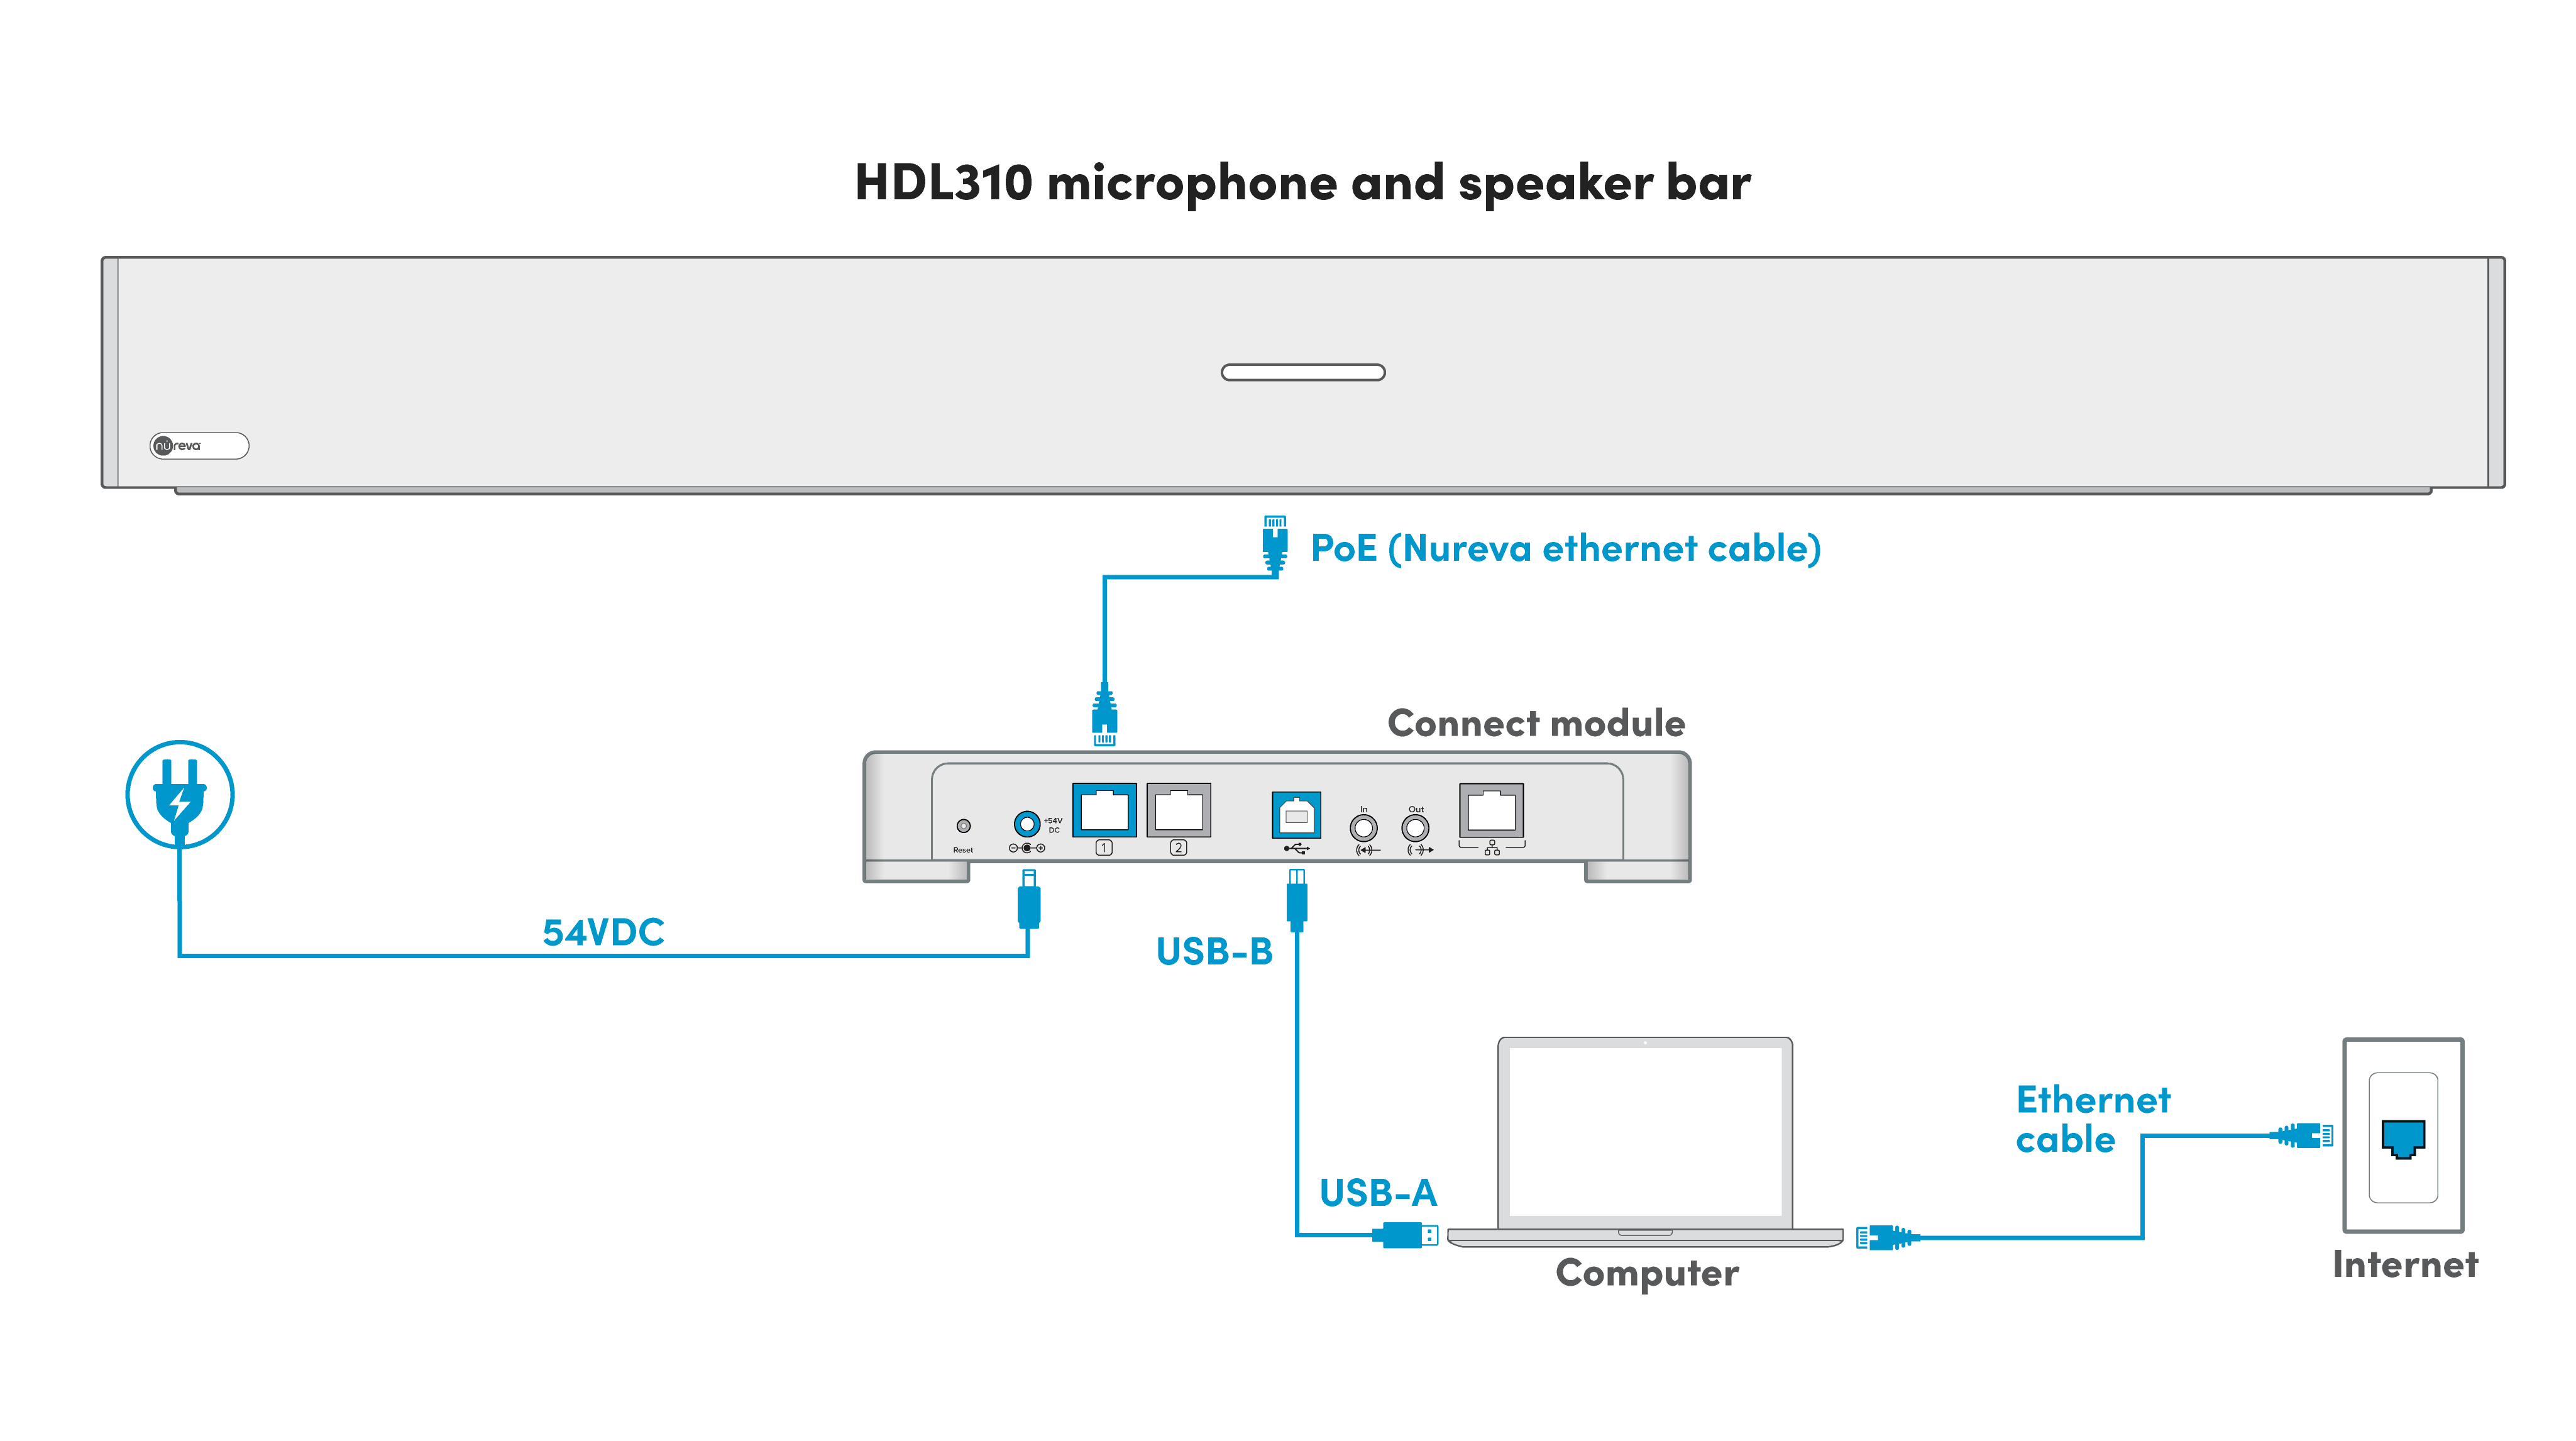
USB connection to the computer
Connect the provided Ethernet cable to the RJ45-1 port on the connect module.
Run the Ethernet cable to the RJ45 port on the microphone and speaker bar.
Connect the provided USB A-B cable to the USB port on the connect module.
Plug the USB cable into a USB port on the computer.
Connect the provided power cord to the connect module and plug it into an outlet or a power bar.
Download and install the Nureva App
1. Download the Nureva App.
2. Launch the Nureva App installer.
3. Follow the steps to complete the installation.
When the installation is complete, a shortcut to the Nureva App and the connected system will be available on the computer’s desktop.
Launch the Nureva App
1. Launch the Nureva App using the desktop shortcut.
2. The Nureva App home page will open.
3. The HDL310 system will be automatically detected.
4. Follow the steps to set up the HDL310 as the default audio device.
The HDL310 system can now be managed locally using the Nureva App directly from the connected computer.
Additional resources
Explore the Nureva App user guide.
Learn how to optimize the HDL310 system settings.