The Nureva® HDL200 system features an LCD screen that provides helpful information, including a clock and status information.
The clock is available only when the device is connected to a computer. On the initial startup, the HDL200 system will indicate it has finished auto-calibrating. It will also indicate if it requires updates. During normal operation, it will display the call status and time of day.
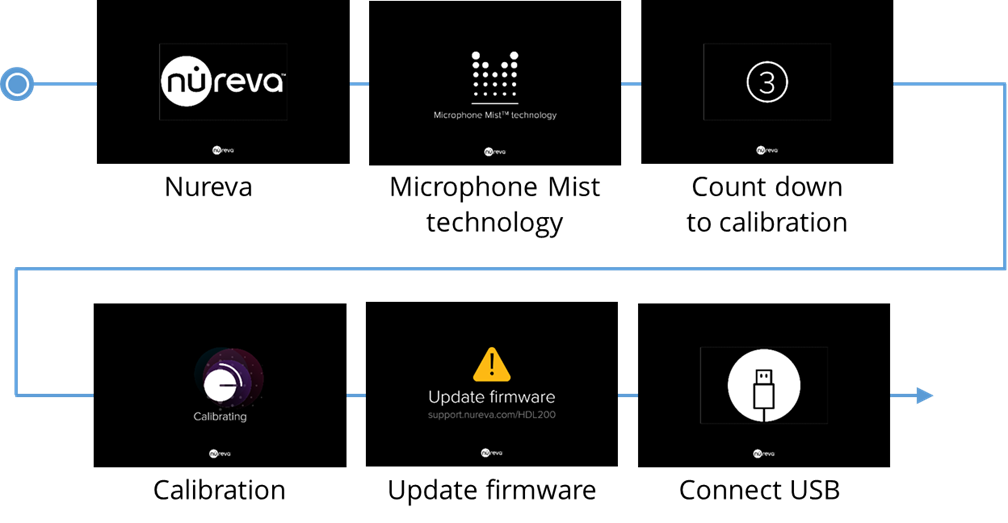
First-time start-up
LCD feedback states — default view
Without clock enabled

With clock enabled

LCD feedback states — optional view
Without clock enabled

With clock enabled

Additional feedback states

Changing the LCD settings
To change the display settings on an HDL200 system, follow the directions in this article:
How to change the display settings on the HDL200 system
Resetting the clock
The HDL200 LCD display can be configured to show a digital-style clock. The default view for the LCD display is without the clock enabled. The clock settings are managed using the Nureva App or Nureva Console.
If the HDL200 system loses power, the clock will remain enabled but the time will not be saved and the clock will flash 12:00 until it is reset.
Ensure the Nureva App is running on the computer the HDL200 connects to.
Unplug and reconnect the USB cable that connects the HDL200 to the computer.
When connected, the clock for the HDL200 will sync to the clock for the computer.
The clock will display the time using a 12-hour clock format (default setting).
Adjust the clock settings as needed.