Installing a Nureva® audio system flush to a wall is not always an option. The optimal installation location could turn out to have a surface that’s challenging or not large enough. Using a backboard to mount the microphone and speaker bar in these situations can help ensure proper microphone pickup.
A backboard can be used with microphone and speaker bars for HDL300, Dual HDL300, HDL310 and HDL410 systems.
Examples of situations for using a backboard
Situations in which Nureva audio system installations will benefit from using a backboard include:
Above an alcove or recessed area
Above a glass wall or large window
On a pillar or column
On a sound-absorbent surface (acoustic panel or fabric covering)
In front of a projection screen
On a highly reflective or reverberant surface
Constructing a backboard
An effective backboard can easily be constructed to provide the hard, flat surface required for microphone pickup.
Suggested material: Plywood, medium-density fiberboard (MDF).
Material to avoid: Glass, metal, fabrics and soft coverings.
Acceptable material: Acrylic (plexiglass) is an acceptable material provided that the microphone and speaker bar is attached flush to it and there are no bends or unevenness to the acrylic surface.
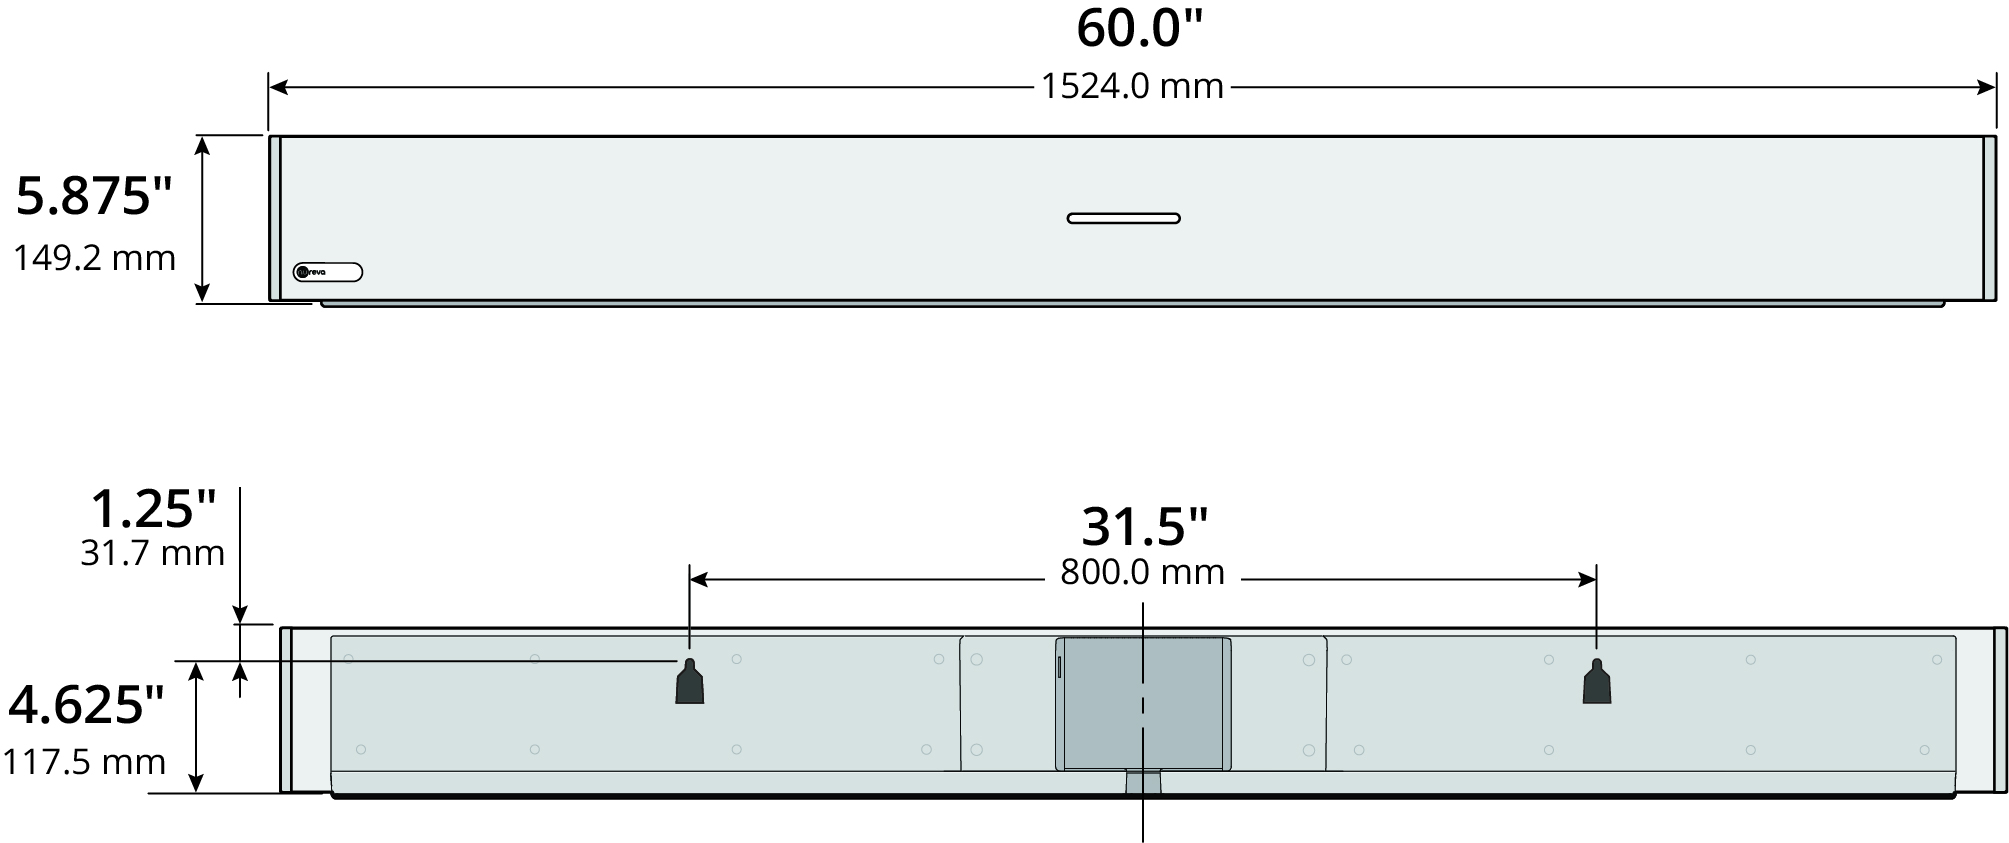
Dimensions
Height: 10" (254 mm)
Width: 60" (1524 mm)
Thickness: 0.75" (19 mm)
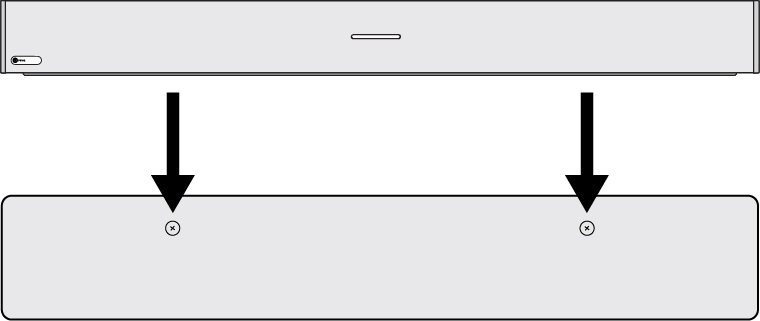
Pilot holes
Two pilot holes, 0.118" (3 mm) in diameter, are positioned 1" (25 mm) from the top and 14.25" (362 mm) from each end. The pilot holes are 31.5" (800 mm) apart.
The pilot holes are used to position the screws that attach the microphone and speaker bar to the backboard.
M5 or #10 pan head screws are recommended for attaching the microphone and speaker bar.
Microphone and speaker bar dimensions