Nureva® Console cloud provides remote management and monitoring capabilities for Nureva audio conferencing systems. To use the available features, an account must be set up and the Nureva devices enrolled into Nureva Console. Sometimes, more than one user will need access to the devices. Nureva Console cloud offers the flexibility of having multiple users for an organization.
User accounts and organizations
During the initial Nureva Console cloud setup and device enrollment, a user account is created. This account is associated with the individual who set it up. When that account is signed in to for the first time, the user is prompted to create an organization. Additional users can then be invited to this organization.
The user account associated with the setup of the organization has the role of “owner.” All subsequent user accounts added to the organization will have the role of “admin.” To add a user to an organization, an invitation is sent through Nureva Console cloud. The invited user can accept or decline the invitation.
Inviting a new user
When inviting a user to join the organization in Nureva Console, there will be some restrictions.
A valid email address is needed for the invited user.
The invited user cannot already be enrolled in the organization or another organization.
There cannot be an outstanding invitation for the invited user.
The invited user cannot be added without accepting an invitation.
To invite a user to the organization, log in to Nureva Console cloud and complete the steps below.
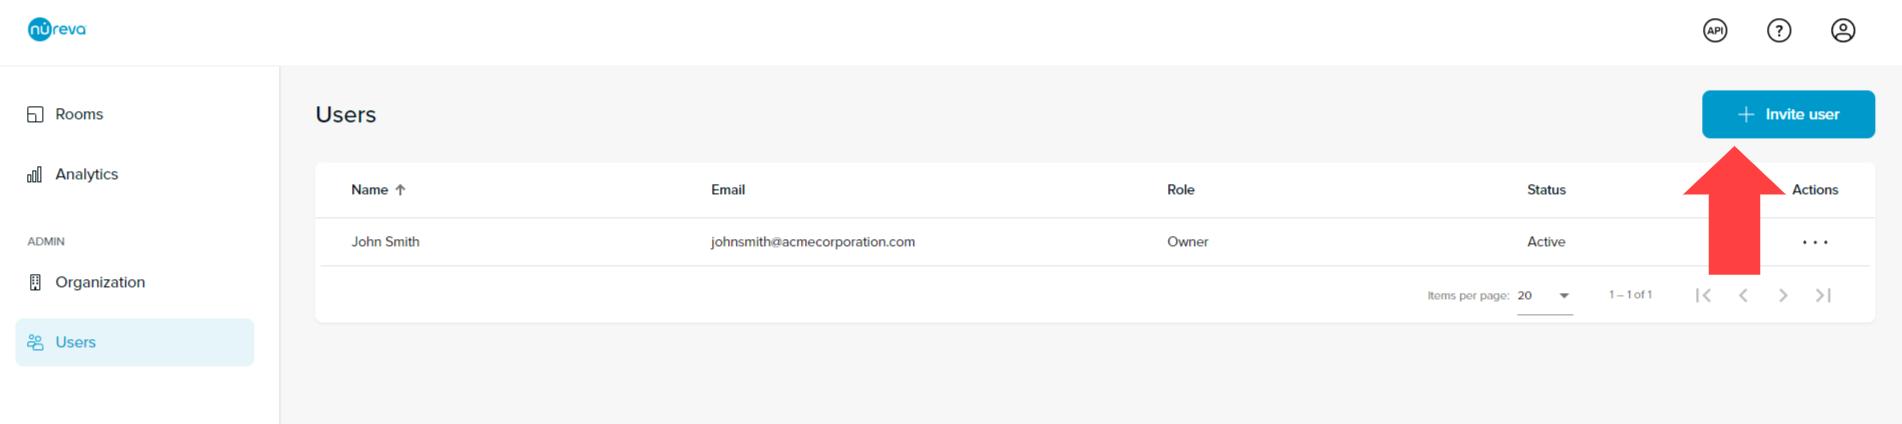
Select Users from the Admin list on the main Nureva Console cloud dashboard.
Click the Invite user button in the upper-right corner of the dashboard.
Enter the email address of the invited person.
Click the Invite button.
Emailed invitation
An invitation will be emailed to the invited user. If the invited user does not already have an account, the invitation will provide a link to create one. If the invited user has an existing account, the invitation will link to the account login page and the invitation can be accepted or declined.
Invited users: Creating an account
Select Create account on the invitation.
Enter a first name and last name.
Create a password.
Agree to the Nureva terms of use.
Opt in or opt out of email notifications.
Click Create account.
After clicking Create account, sign in to the account to finish accepting the invitation.
Enter the email address and password.
Select Sign In.
Accept or Decline the invitation.
Invited users: Signing in to an existing account
Clicking Accept invitation in the email opens up the Nureva Console cloud sign-in page.
Enter the email address and password.
Select Sign In.
Accept or Decline the invitation.
Accepting an invitation
After clicking Accept, the browser will take the invited user to the Nureva Console cloud dashboard. From this dashboard, the invited user will now have privileges for managing the devices enrolled in the organization.
Declining an invitation
If the invited user chooses to Decline the invitation, the option to create an organization will be provided. If an organization is not created at this time, the invited user will have a Nureva Console account but will not be able to enroll or manage devices. To do this, the invited user will need to create or join an organization.