For camera integration, Nureva® Console and the Nureva App use the default port 8931 to connect with the WebSocket server. This port is configurable in both applications and can be set to any port number. Depending on the network and security setup, some unused and open ports can be blocked at the network, computer or router level.
The Nureva applications and the camera software might need to be allowed to make connections and share sound location data using the default port or any other port. Enabling a network port on both a router and a computer involves several steps. The exact process can vary depending on the router and the computer’s operating system, but here’s a general outline of the steps you might need to take.
Overview
Identify the network port that the third-party camera requires or select a specific port.
The first step is to identify the network port that the third-party camera requires. This information can be found in the camera’s documentation. The default and most common port used by IP cameras is port 8931.
Check if the port is open.
Enable the required network port on the router or PC.
When the required network port and protocol (TCP or UDP) has been identified, if it is not already open, it must be enabled on the router or PC, depending on the level at which it’s blocked.
Add the allowed hostnames.
The final step is to add the allowed hostnames to Nureva Console or the Nureva App. This will allow them to communicate with the third-party camera. The allowed hostnames are the IP addresses or hostnames of the cameras to be integrated with the Nureva system.
Open the Nureva application and go to Settings > Local Integrations to add the allowed hostnames. Enter the IP address or hostname of the camera.
After these steps have been completed, the third-party cameras will be able to communicate with the Nureva system and can be used for camera tracking.
Note: While it is possible to allow ports on a local computer, we recommend getting support from the IT team when opening any port on a router to ensure only the ports required by the third-party camera are enabled. Enabling unnecessary ports can increase the security risk.
Check if a network port is open
Windows
There are a few ways to check if a network port is open on a Windows® computer. Below are two easy options.
Option 1
Open the command prompt by pressing the Windows key + R and typing cmd
Type netstat -aon and press Enter. Note that there is a space between netstat and -aon
Look for the port numbers in the LISTENING state
These are the ports that need to be open for streaming
If the port numbers aren’t in the LISTENING state, they will need to be opened manually

Option 2
Open the command prompt by pressing the Windows key + R and typing cmd
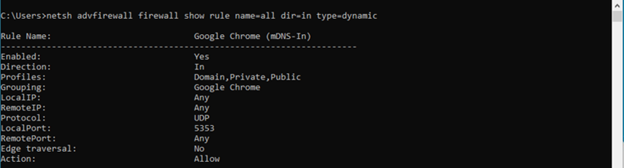
Enter netsh advfirewall firewall show rule name=all dir=in type=dynamic
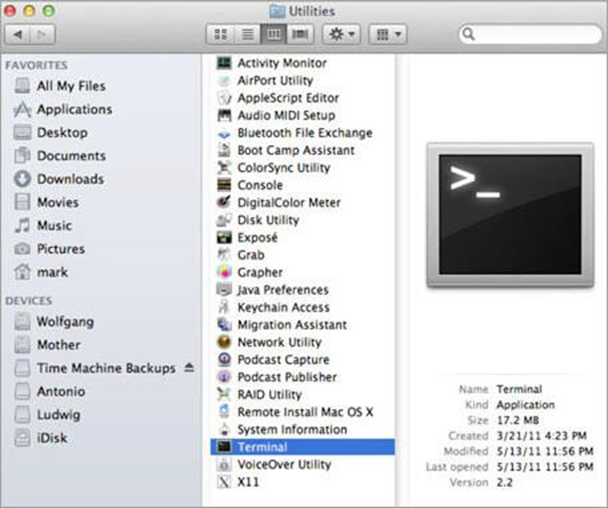
macOS
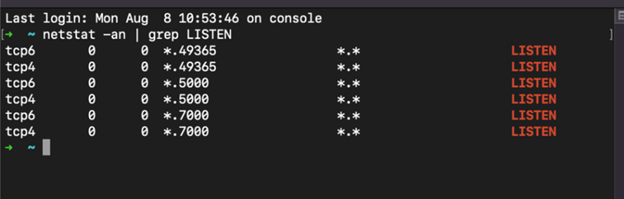
On a macOS® computer, open the Terminal application and enter netstat -an | grep LISTEN
A list of all the open ports will appear, along with the process ID (PID) verification service and name of the application using each port
To confirm what a particular port is used for, look it up in the /etc/services file
To view the contents of this file, enter cat /etc/services
Enabling a network port on a router
The steps below for allowing a port will vary depending on the type of router. The process involves finding the port forwarding section in the router’s settings and adding a rule for allowing the port. The rule should specify the internal IP address of the camera and the external port number.
Access router settings: Open a web browser on a device connected to the same network as the router. Enter the router’s IP address in the address bar. The default IP address is often 192.168.1.1 or 192.168.0.1. Enter the router’s admin username and password.
Proceed to port forwarding: The exact location of this option will vary depending on the router’s interface. Look for Port Forwarding, Port Mapping or Virtual Server options. Then select which external ports should be forwarded to internal devices.
Add a port forwarding rule: Next, add a new rule in the port forwarding section. This usually involves specifying the protocol (TCP or UDP), the external port, the PC’s internal IP address and the internal port selected for forwarding. This tells the router to send incoming data on the specified external port to the internal PC’s IP address and port.
Save settings: After adding the port forwarding rule, be sure to save the settings. The router will start directing incoming traffic on the specified port to the PC.
Enabling a network port on a computer
Windows
Windows (as with many other operating systems) includes a built-in firewall that regulates incoming and outgoing network traffic. If the firewall is blocking the port being enabled, it will be necessary to create an exception.
Access the firewall settings by following the steps in either of the options below.
Option 1
Press Windows key + S together
Enter Windows Defender Firewall
Click Windows Defender Firewall
Option 2
Press Windows + R to open the Run dialog
Enter Control panel and click OK
Select Windows Defender Firewall
Create an inbound rule
In the firewall settings, create an inbound rule to allow traffic to the specific port.
Click Advanced settings or Advanced firewall settings
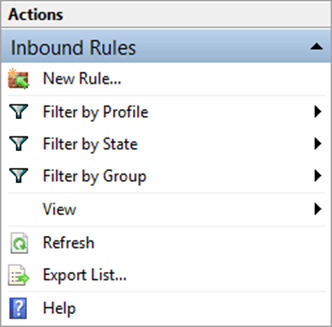
In the left pane, select Inbound Rules
Click New Rule... in the right pane
Select Port as the rule type and click Next
Select TCP or UDP depending on the protocol used by the application
Select Specific local ports and enter the applicable port number
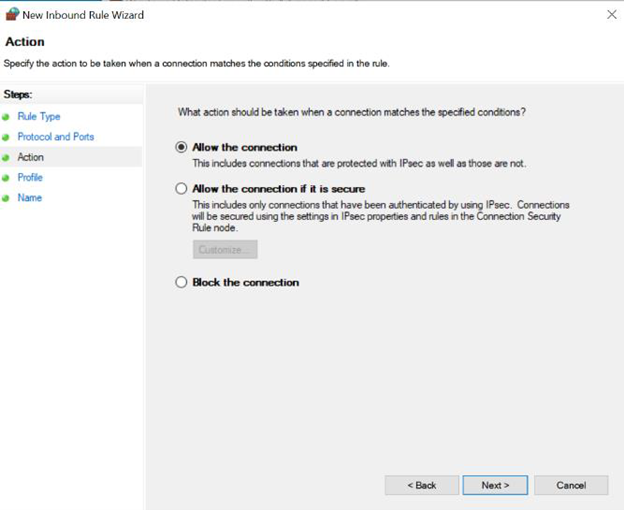
Select Allow the connection and click Next
Provide a name for the rule and a description (optional)
Click Finish to create the rule
After the inbound rule has been set up, it should take effect immediately. However, it might be necessary to restart the computer or network services.
Test the port
When port forwarding has been set up on the router and the PC configured, the port can be tested to see if it’s open and accessible from the outside.
macOS
The macOS firewall, by default, is disabled. That means the computer will accept all incoming and outgoing connections. But if the firewall has been turned on, it might be necessary to open a port to allow an inbound connection.
Go to the Terminal app
Enter sudo pfctl -d to stop the filter firewall
Now enter sudo nano /etc/pf.conf
Go to the end of all configurations
Enter pass in inet proto tcp from any to any port [ add port number ] no state
This roughly translates to allowing incoming TCP from any machine to any other machine on that specific port number without inspection
Press Ctrl + X together to exit the nano
Press Y and press Enter
The technical information in this article, including specifications and recommendations, is provided for customer convenience. The accuracy of this information is not guaranteed and is subject to change without notice. Please check the user manuals and related documentation from each product manufacturer to ensure that your setup meets the proper recommendations.