Connect the HDL310 system
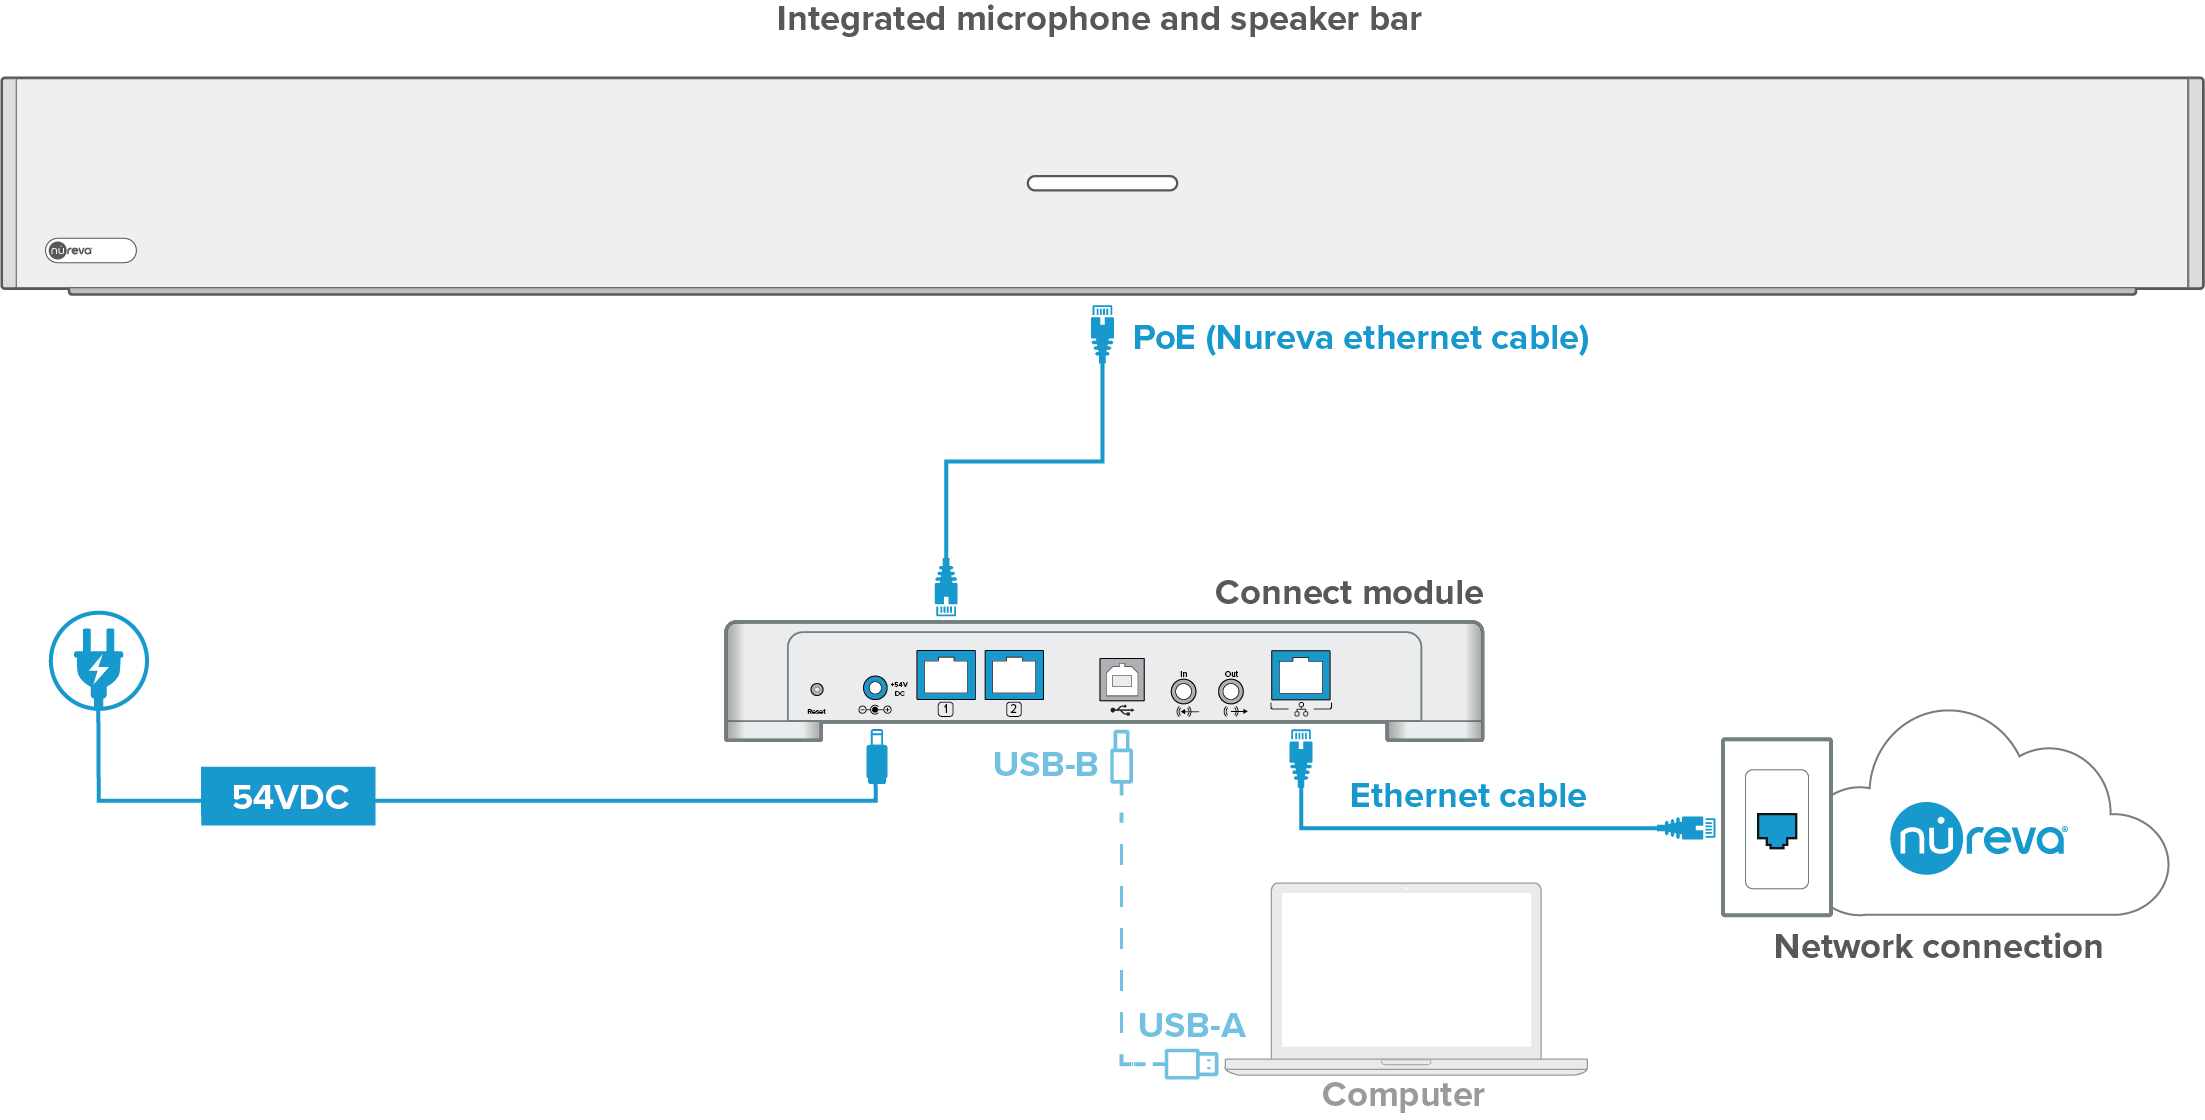
Connect the provided Ethernet cable to the RJ45-1 port on the connect module.
Run the Ethernet cable to the RJ45 port on the microphone and speaker bar.
Connect a CAT5e Ethernet cable to the network port on the back of the connect module.
Plug the CAT5e Ethernet cable into a network port (router, modem, wall jack).
Connect the provided power supply to the connect module and plug it into an outlet or a power bar.
After it is powered up, the HDL310 system will automatically calibrate.
Please remain quiet in the room until calibration is complete.
After calibration, the HDL310 system may require an update.
Connect a computer
To participate in an audio or video conference, a computer is required.
Connect the provided USB cable to the USB-B port on the connect module.
Run the cable to the computer and connect it to a USB-A port.
After the conference has finished, the computer can be disconnected from the connect module.
Local device management
By connecting a USB cable from a system’s connect module to a computer, the HDL310 can be locally managed through the Nureva® App. This method is available as an alternative to managing the HDL310 over a local area network or direct Ethernet connection.
Learn more about using a USB connection with the HDL310 system.
Overheating
Do not block the vents on the connect module’s top, bottom or back.
Ensure adequate space between all vents and other objects to promote airflow and cooling. These vents are required to keep the circuits from overheating.
Avoid installing the connect module in a confined space.

Enrollment code
The HDL310 system is network-enabled, allowing easy enrollment into Nureva Console. An enrollment code is provided on a label found at the bottom of the connect module. It is recommended a note be made of the enrollment code before installing the connect module.
Learn more about enrolling an HDL310 system.
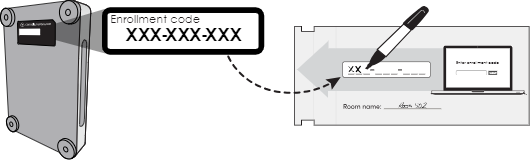
Note: This code is specific to the HDL310 system and cannot be used for other Nureva systems.