The unified coverage map in the Nureva® App visually represents the HDL410 system’s microphone coverage. It updates in near real time with sound location data, allowing a user to adjust room dimensions, create zones and monitor audio for optimal performance.
Before starting
Set up the HDL410 system by following the steps in the get started guide.
Open the Nureva App and connect to the HDL410 system.
The Nureva App is available from the App Store® (iOS, iPadOS®), Google Play™ (Android™) and through a web browser by using the IP address for a Nureva HDL410 device.
How to adjust the room layout
Adjustments can be made to the room layout to correctly reflect the actual layout of the room. This includes:
Adjusting the room size.
Changing the distance between the wall and the microphone and speaker bar.
Moving and rotating the microphone and speaker bar.
The room size will default to the maximum supported by the HDL410 system.
View room layout
Open the Nureva App using a browser, an iPhone® or iPad® device or an Android mobile device.
Connect to the app by entering the HDL410’s IP address and enrollment code, then select Continue.
If the enrollment code has been replaced with a password, enter the password.
The app will advance to the Nureva App home page.
Open the Coverage map menu.
On the coverage map, the default room layout will be visible.
Adjusting the room layout
Step 1: Confirm system placement
When viewing the coverage map, if the microphone and speaker bar position(s) are not represented correctly, it is recommended that a system calibration is performed. Note that the microphone and speaker bar connected to input 1 will always be represented at the bottom of the map and a calibration will not change its position.
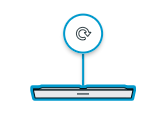
How to calibrate the HDL410 system
If the system placement is still not accurate after a calibration is completed, information about making further adjustments is available in Step 2.
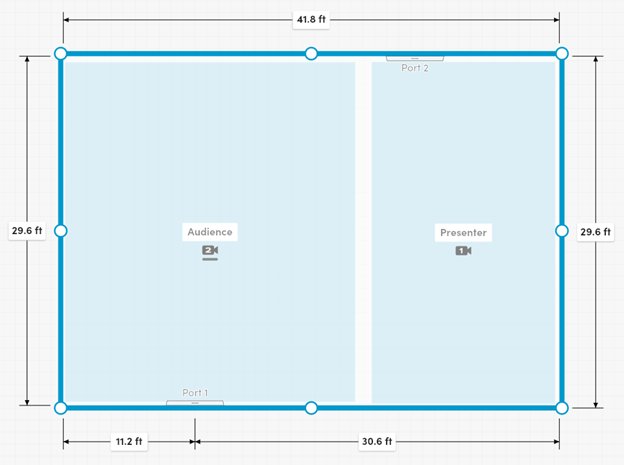
Step 2: Refine the room size
Adjusting the coverage area to the correct room dimensions helps to refine the sound location data and provides a more accurate coverage map.
Important: The position of the microphone and speaker bar connected to Port 1 on the connect module cannot be changed.
Select the room walls to see their current dimensions.
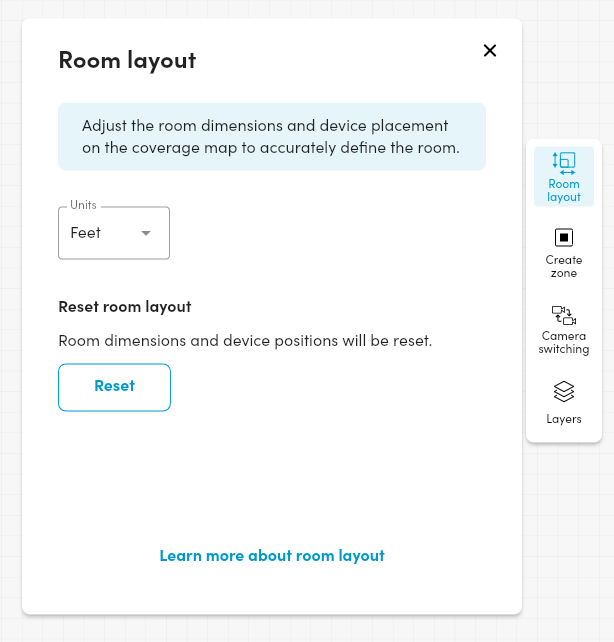
To change the units displayed on the coverage map, press the Room layout button and adjust the unit option.
Drag the resize handles to correctly resize the room walls.
The dimension of the wall to the Port 1 microphone and speaker bar is measured from the center of the back of the bar.
When the room walls have been adjusted to the correct room dimensions, press Apply to save the changes.
Walk around the room and speak to confirm that the sound location data is visible on the map and is shown in the correct locations.
Move or rotate the microphone and speaker bar
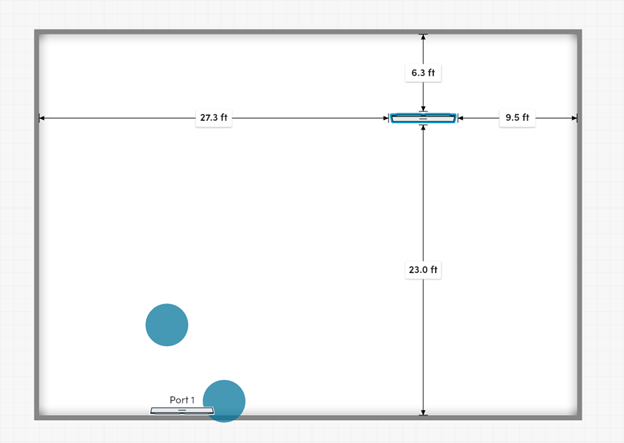
If the system placement is still not accurate after the calibration in Step 1, it is possible to move or rotate the microphone and speaker bar connected to Port 2 on the connect module. This is not a required step and should only be done when the position of the system varies greatly to that in the real space. This movement will affect sound location data and audio performance.
To move
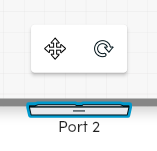
Select the Port 2 microphone and speaker bar.
Select the move icon in the floating editing bar.
Confirm that you want to adjust the device position.
Move the microphone and speaker bar by dragging the icon around within the room. Dimensions will be shown between the microphone and speaker bar and the walls.
To rotate
Select the Port 2 microphone and speaker bar.
Select the rotate icon in the floating editing bar.
A new rotation icon will appear on the Port 2 microphone and speaker bar.
Rotate the microphone and speaker bar by dragging the rotation icon attached to the Port 2 bar. The HDL410 supports 90-degree rotation, so when rotation is released the icon will snap to the closest 90 degrees.
When the new device position is correct, press Apply to keep all the changes.
Reset room layout
Resetting the room will restore the default room size and the system placement based on a calibration.
On the coverage map, select the Room layout button in the side menu.
The room layout panel will open.
Press the Reset button to reset both the room size and the system placement.
Press Apply to apply the changes to the room layout.